ASP.NET Core with WordPress#
WpDotNet is a package made primarily to be used as a part of an ASP.NET Core application. Its possible uses are:
- Running WordPress on ASP.NET Core, without PHP, or any source files on the server.
- Adding WordPress as a frontend to an existing ASP.NET Core application.
- Combining WordPress and MVC or Razor views.
- Extending WordPress with plugins in C#.
Create and deploy an ASP.NET Core Web application with WordPress#
The following tutorial is shown in Visual Studio 2019.
-
In Visual Studio, create a new ASP.NET Core Web Application. Select File | New | Project and search for the ASP.NET Core Web Application template for C#.
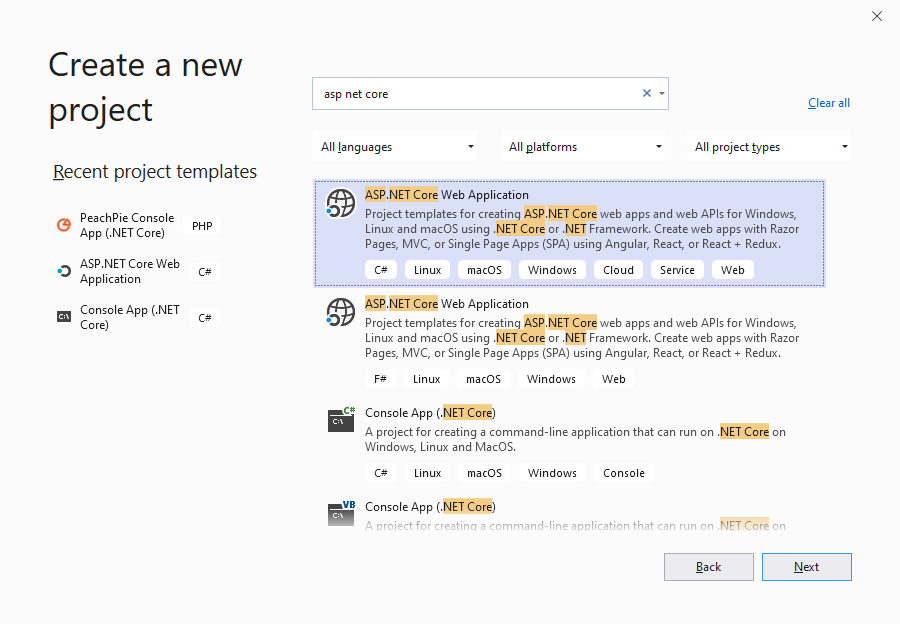
Continue with Next and Create.
-
In the last step, make sure you are targeting ASP.NET Core, at least 3.0. Other options can be customized. For an empty web site, choose the Empty project template, as it does not have any unnecessary logic.
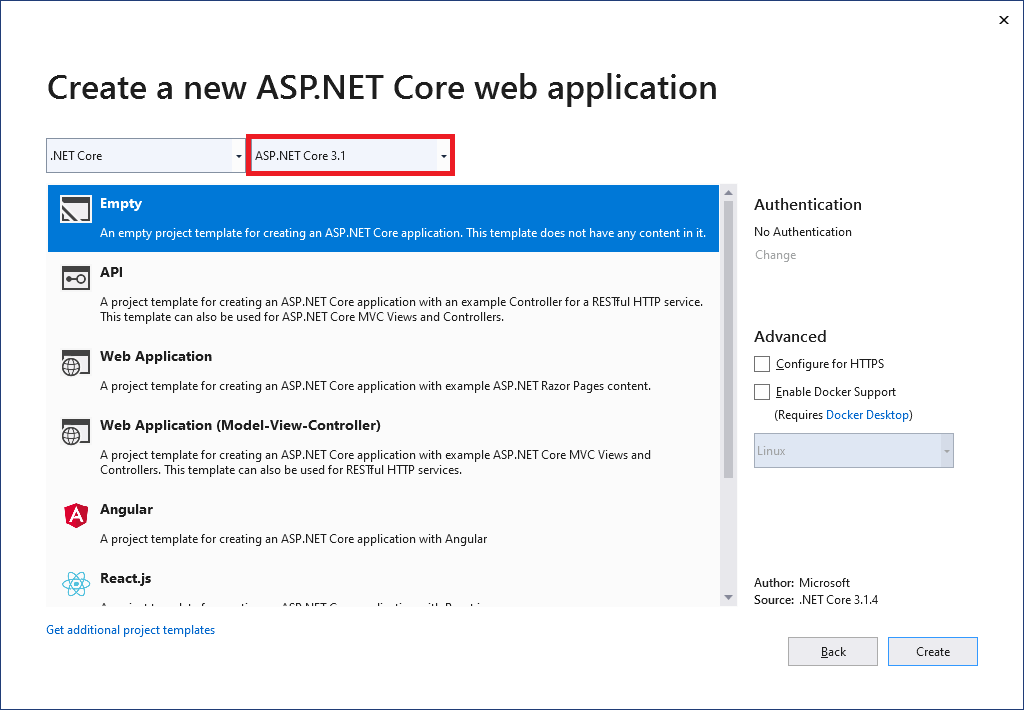
Continue with Create.
-
Add a package reference to PeachPied.WordPress.AspNetCore. Right click the project and select Manage NuGet Packages.... Switch to the Browse tab, tick Include prerelease, and search for PeachPied.WordPress.AspNetCore.
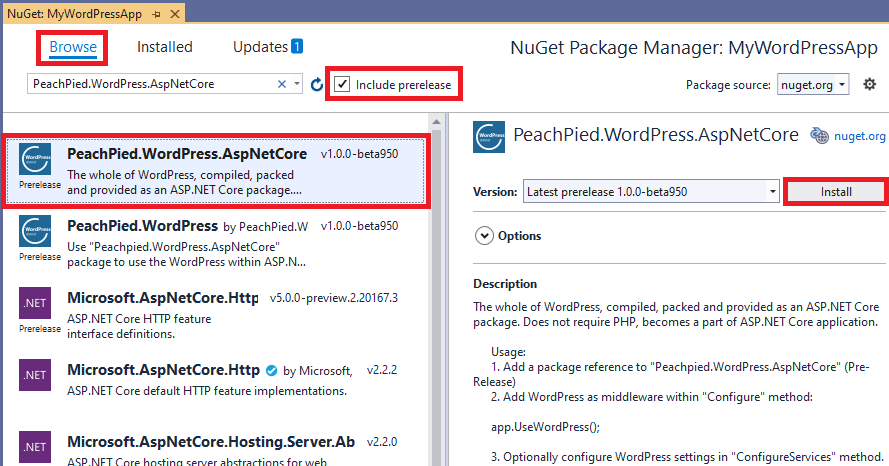
Click Install and wait for the process to complete. Accept the license terms if prompted.
-
Next add WordPress to your request pipeline. Navigate to class Startup in file Startup.cs.
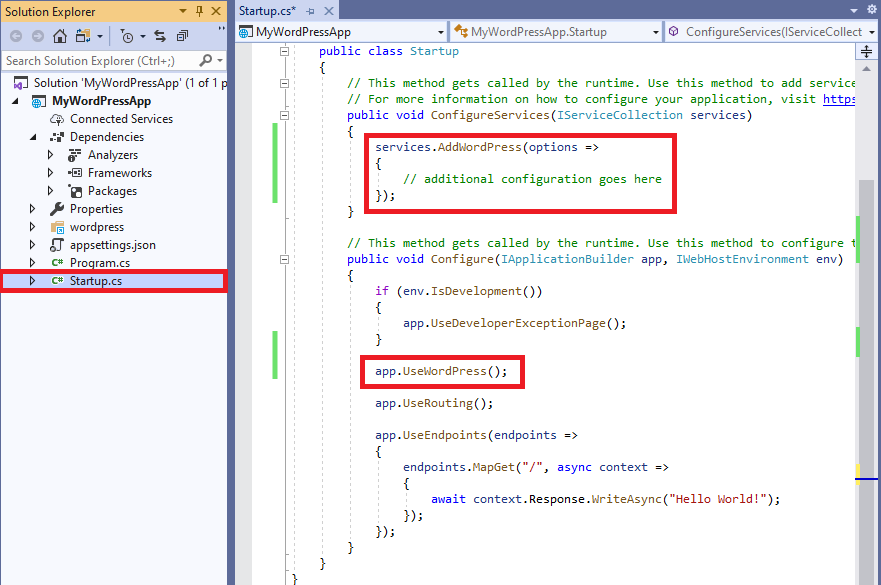
Add
UseWordPress()into your IAplicationBuilder, preferably right before UseRouting().app.UseWordPress();The optional
services.AddWordPress( ... )can be used to alter the WordPress configuration, such as the Site URL, database connection credentials and others, as described in configuration. -
Prepare the MySQL server. Make sure you have MySQL server running:
- MySQL server is installed and running. It is up to you whether to install it locally, run it in a virtualized environment, such as Docker, or elsewhere.
Example command to run MySql using docker:
docker run -e MYSQL_ROOT_PASSWORD=password -e MYSQL_DATABASE=wordpress -p 3306:3306 -d mysql:latest- A database is created. It can be an empty database or a duplicate of an existing database with WordPress.
- Ensure you have a valid username, password, and server address.
-
Enter the MySQL connection credentials in appsettings.json. Open the appsettings.json file and add the following section:
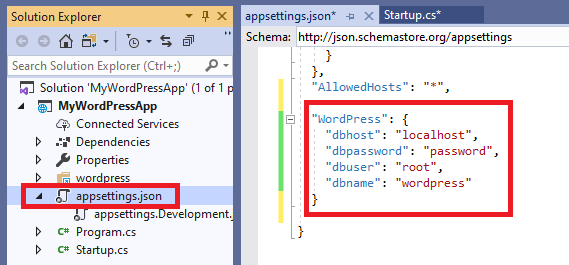
{ "WordPress": { "dbhost": "localhost", "dbpassword": "password", "dbuser": "root", "dbname": "wordpress" } } -
Run the application. Hit
F5or press the Start button in Visual Studio. -
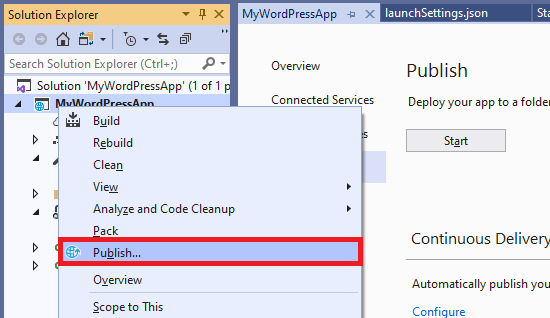
Deploy the application using the Publish wizard. Right click the project, select Publish, and follow the instructions.
Grab the sample solution#
A complete ASP.NET Core application with WordPress is available on GitHub:
The content of the repository is ready to be built, debugged, and published. It can be opened in a .NET IDE (Visual Studio, VS Code, Rider) for further customization.
Deploy Pre-Compiled to Azure#
In case you don't need any customizations and you just want to publish WordPress running on .NET to your Azure, follow the link below:
Please note that the deployment link above requires the target Azure cluster to have the .NET Core 3.1 SDK installed.